
Lutron smart outlets are compact, reliable solutions for anyone looking to automate lighting and device control without rewiring a room. Unlike basic WiFi plugs, Lutron outlets integrate into a cohesive ecosystem that works with existing switches, dimmers, and home automation systems. Whether someone’s upgrading a single room or building out a whole-home automation project, understanding what Lutron smart outlets do, and how to install and control them, makes the difference between a smooth setup and frustrating troubleshooting. This guide covers everything from installation basics to app control and system integration, so readers can make informed decisions about whether Lutron is the right fit for their home.
Key Takeaways
- Lutron smart outlets offer reliable automation without WiFi by using a closed-system RF protocol at 434 MHz, providing rock-solid connectivity across up to 150 feet without network congestion.
- Installation requires basic wiring skills—replacing standard outlets with hardwired Lutron units—and a Caseta hub ($60–$120) is needed for app control, scheduling, and voice integration.
- Control Lutron smart outlets through the mobile app for instant toggling, create automation scenes to link multiple devices, schedule recurring actions, or use voice commands with Alexa and Google Assistant.
- Lutron smart outlets integrate seamlessly with other Lutron devices like dimmers and switches in a single scene, but third-party compatibility is limited unless using the Smart Bridge Pro for HomeKit and API access.
- Common issues—unresponsive outlets, slow voice commands, or pairing failures—are resolved by checking hub connectivity, restarting devices, and ensuring proper wire seating during installation.
What Are Lutron Smart Outlets and How Do They Work
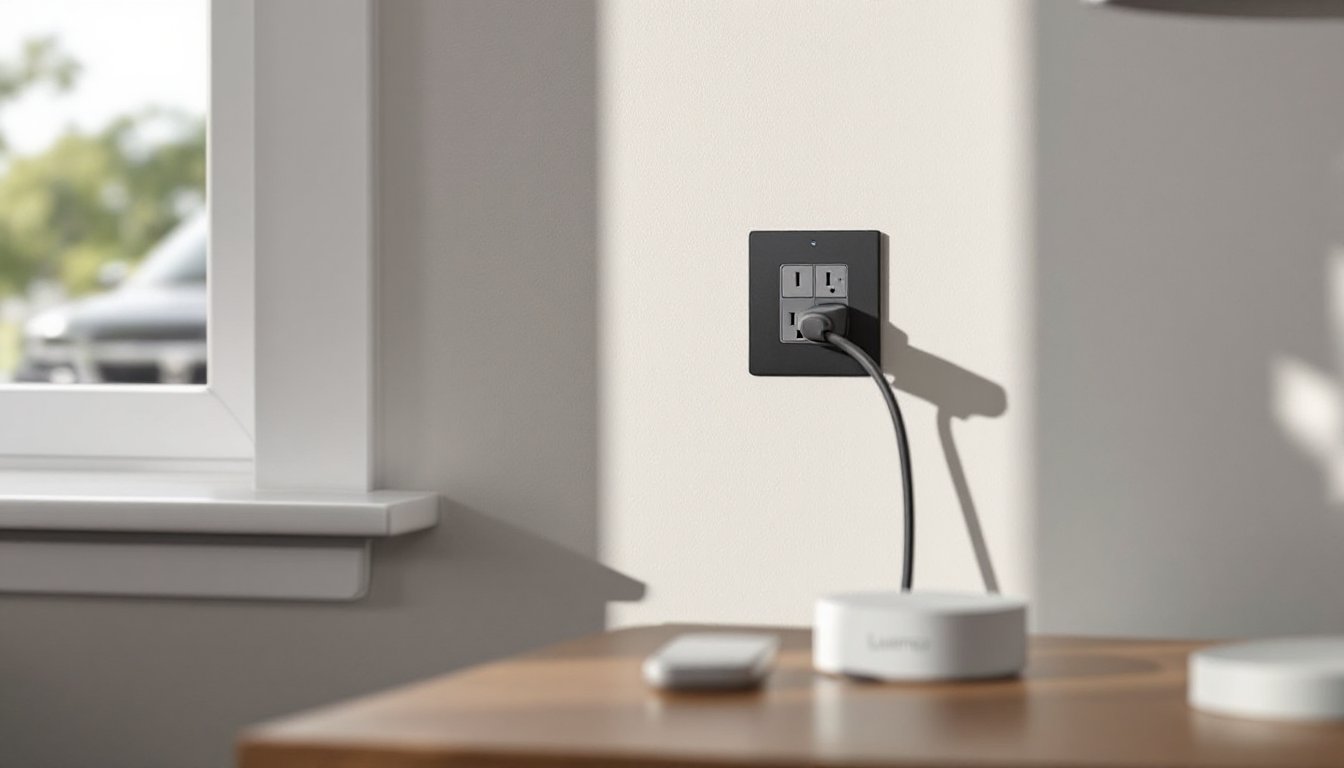
Lutron smart outlets are in-wall receptacles that replace standard 15- or 20-amp outlets and allow remote control of connected devices. Unlike plug-in smart strips, Lutron outlets are hardwired into electrical boxes during installation, making them a permanent part of the home’s infrastructure. They communicate via the Lutron Caseta Wireless protocol, a closed-system, low-frequency RF signal that doesn’t rely on WiFi or internet connectivity. This approach offers two major advantages: rock-solid reliability without network congestion, and enhanced security because the system operates independently of home WiFi.
Most Lutron smart outlets, such as the Lutron Caseta Plug-Load Switch, control power delivery to any device plugged into them. When paired with a Lutron Pico remote or controlled through the Lutron mobile app, users can turn devices on and off, schedule them, or link them to other smart home rules. The outlet doesn’t dim, it’s either on or off, but that’s intentional: it’s designed for appliances, fans, and devices that aren’t dimmable, unlike Lutron’s smart dimmers for lights. Installation requires turning off power at the breaker and running two wires (hot and neutral) to the outlet box: it’s a standard electrical job that most homeowners with basic experience can handle, though hiring a licensed electrician is advisable if uncertain.
Key Features and Benefits of Lutron Smart Outlets
Lutron smart outlets pack several features that appeal to DIYers and automation enthusiasts:
Wireless Protocol & Range: The Caseta Wireless closed system operates at 434 MHz, avoiding WiFi congestion and interference. Range extends up to 150 feet in open space and repeats through other Lutron devices, so coverage spans large homes without dead zones.
Scheduling & Automation: Users set recurring schedules (e.g., turn off office fan at 9 p.m. weekdays) or create scenes that link multiple outlets to a single button press. If the Caseta hub is connected to the cloud, automation also works when away from home.
Voice Control: After pairing with Alexa or Google Assistant via the Lutron bridge, users voice-command outlets hands-free. “Alexa, turn off the basement dehumidifier” becomes as simple as it sounds.
Reliability & Longevity: Lutron hardware is built for durability. Smart outlets carry 10-year warranties, and the closed RF system means fewer software updates or compatibility headaches that plague WiFi-only systems.
No Hub Required (Partial): A single smart outlet works standalone with Pico remotes. But for app control, scheduling, and voice integration, the Lutron Caseta Smart Bridge (or Lutron Smart Bridge Pro) is needed, a small hub that connects to home broadband and costs $60–$80.
Wide Device Compatibility: Outlets work with any plug-in device: lamps, fans, dehumidifiers, smart speakers, or coffee makers.
Setting Up Your Lutron Smart Outlet
Installation involves three main steps: prep work, wiring, and pairing.
Before You Begin:
- Turn off the circuit breaker supplying the outlet being replaced. Test the outlet with a non-contact voltage tester to confirm power is off, this is non-negotiable safety.
- Gather tools: flathead and Phillips screwdrivers, wire strippers, and the voltage tester.
- Have the Lutron outlet, Pico remote (optional), and Caseta hub on hand.
Wiring the Outlet:
- Remove the old outlet by unscrewing the two wires (hot and neutral): ground wire stays in place.
- Gently withdraw the old outlet, leaving wires in the box.
- Use wire strippers to remove ¾ inch of insulation from wire ends if they’re damaged.
- Insert the stripped hot wire (usually black, 14 or 12 gauge) into the brass terminal on the Lutron outlet: tighten the screw firmly.
- Insert the neutral wire (usually white) into the silver terminal: tighten.
- Connect ground (green or bare copper wire) to the green screw.
- Gently push the outlet into the box and screw the faceplate back on.
Pairing & Testing:
- If using only a Pico remote, press the top and bottom buttons simultaneously on the remote for 3 seconds near the outlet until it blinks (pairing complete).
- For app and voice control, download the Lutron app, add the outlet to the hub during setup wizard, and assign it a room and name (e.g., “Kitchen Dehumidifier”).
- Test: toggle the Pico remote or app to verify the outlet responds instantly.
Note: If the home’s wiring is old (aluminum or cloth-wrapped) or the install seems complicated, call a licensed electrician. Some jurisdictions require electrical permits for outlet replacement: check local code.
Controlling Your Smart Outlet with Apps and Voice Commands
Once paired, controlling a Lutron smart outlet is straightforward.
Via the Lutron App:
- Open the app, tap the outlet by name, and press the on/off button. Toggling happens instantly because of the direct RF link to the outlet, no lag.
- Create scenes: group multiple outlets (and lights, if using Lutron dimmers) to activate with one tap. Example: tap “Evening” to turn off office fan, dim kitchen lights, and enable porch light.
- Schedule recurring actions: set a fan to turn on every Monday–Friday at 7 a.m. and off at 6 p.m.
- Use geofencing: have the outlet turn on a humidifier when someone arrives home (requires Caseta hub and app location permission).
Voice Control:
- Pair the Lutron hub to Alexa or Google Home via the respective app’s smart home settings.
- Command examples: “Alexa, turn on the garage outlet,” “Google, switch off basement dehumidifier.”
- Voice control is fast but slightly slower than app or remote, typically 1–2 seconds due to cloud routing.
Pico Remote Control:
- No app or WiFi needed. Press buttons on the Pico for instant, wireless control within 150 feet of the outlet.
- Pico remotes are ideal for areas without cell service or as a backup if the app crashes.
One pro tip: use the Lutron app’s activity log to monitor when devices were turned on or off, useful for troubleshooting automation issues or verifying a device actually shut down.
Integration with Smart Home Systems
Lutron outlets work within a broader automation ecosystem, but integration depends on which hub and platform someone uses.
With Caseta Smart Bridge (Standard):
The basic hub connects to home WiFi and pairs with Alexa or Google Home. Outlets show up as controllable devices in those ecosystems, but direct integration with other smart home brands (like SmartThings, Home Assistant, or Apple HomeKit) is limited.
With Caseta Smart Bridge Pro:
This upgraded hub ($100–$120) adds HomeKit compatibility and third-party integrations via APIs. Users can control Lutron outlets from Apple Home app, and advanced automators can connect them to Home Assistant or other open platforms.
Third-Party Compatibility:
Lutron doesn’t natively support SmartThings or Z-Wave hubs. Workarounds exist (using IFTTT or webhooks), but they add latency and complexity. If the home is already invested in SmartThings or Z-Wave, weigh whether Lutron’s reliability outweighs the integration friction.
Pairing Outlets with Other Lutron Devices:
This is where Lutron shines. A single scene can link smart outlets, dimmers, and switches. Example: press one Pico remote button to dim bedroom lights, turn off the ceiling fan outlet, and enable the white noise machine, all coordinated on the Caseta protocol.
Common Issues and Troubleshooting Tips
Outlet Not Responding in App:
- Check the hub is powered and connected to WiFi (look for solid green light).
- Toggle outlet power off and on at the breaker: wait 30 seconds and refresh the app.
- Restart the hub: unplug for 10 seconds, plug back in, and wait 2 minutes for reconnection.
Voice Commands Fail:
- Verify the outlet name in the app has no special characters or confusing similar names (e.g., “office fan” vs. “office outlet” can confuse voice assistants).
- Re-authorize Lutron in the Alexa or Google Home app under smart home device settings.
- Check the hub’s broadband connection, voice relies on cloud routing.
Slow Response or Lag:
- Voice commands are slowest (cloud-dependent). App toggling and Pico remotes are nearly instant.
- If app is sluggish, restart the hub or check WiFi signal strength near the hub.
- RF interference is rare but possible near 2.4 GHz devices (microwaves, older cordless phones). Relocate the hub a few feet if interference is suspected.
Outlet Won’t Pair with Pico Remote:
- Ensure the Pico and outlet are within 20 feet during pairing.
- Press and hold the top and bottom Pico buttons for a full 3 seconds: hold longer if pairing doesn’t trigger a blink.
- Reset the outlet by flipping the breaker off, waiting 30 seconds, then back on.
Physical Outlet Not Working After Installation:
- Check that the power is back on at the breaker.
- Verify the hot and neutral wires are firmly seated in the Lutron outlet terminals (loosen screws, reseat wires, retighten).
- Test with a different device to rule out a plugged-in device malfunction.
- Use a voltage tester on the outlet to confirm power is present.
Conclusion
Lutron smart outlets offer a practical, reliable way to automate plug-in devices and appliances without WiFi headaches or constant software updates. Their closed RF system and Pico remote flexibility make them ideal for homeowners who want dependable smart home control. Installation is straightforward for those comfortable with basic wiring, but a licensed electrician is the right call if there’s any doubt. Start small, add one outlet to test the workflow, then expand as confidence grows.