
Cable deck railings have become the go-to choice for homeowners wanting a contemporary, unobstructed view from their deck without sacrificing safety or durability. Unlike traditional balusters that block sightlines, steel cables strung between sturdy wood posts create a sleek, modern aesthetic while meeting building code requirements. Whether upgrading an existing deck or building from scratch, understanding how to select materials, install, and maintain a cable railing system ensures a project that looks sharp for decades. This guide walks through everything a DIYer needs to know about cable deck railings with wood posts, from material selection to long-term care.
Key Takeaways
- Cable deck railings with wood posts combine modern aesthetics with unobstructed views while meeting all safety codes and lasting 15-20+ years with minimal maintenance.
- Use structural-grade pressure-treated lumber (rated .60 PCF or higher) for posts and marine-grade 316 stainless steel cable with matching stainless steel hardware to prevent galvanic corrosion.
- Proper tensioning is critical—cables must be taut but not over-tight to maintain code compliance, avoid sagging, and keep posts plumb throughout the system’s life.
- Cable spacing must never exceed 4 inches between runs to prevent children from squeezing through, and the railing must reach a minimum of 42 inches above the deck surface.
- Spring inspections and annual re-tensioning of fittings, combined with fresh water rinsing after salt exposure and deck sealant reapplication every 2-3 years, ensure long-term durability.
What Are Cable Deck Railings With Wood Posts?
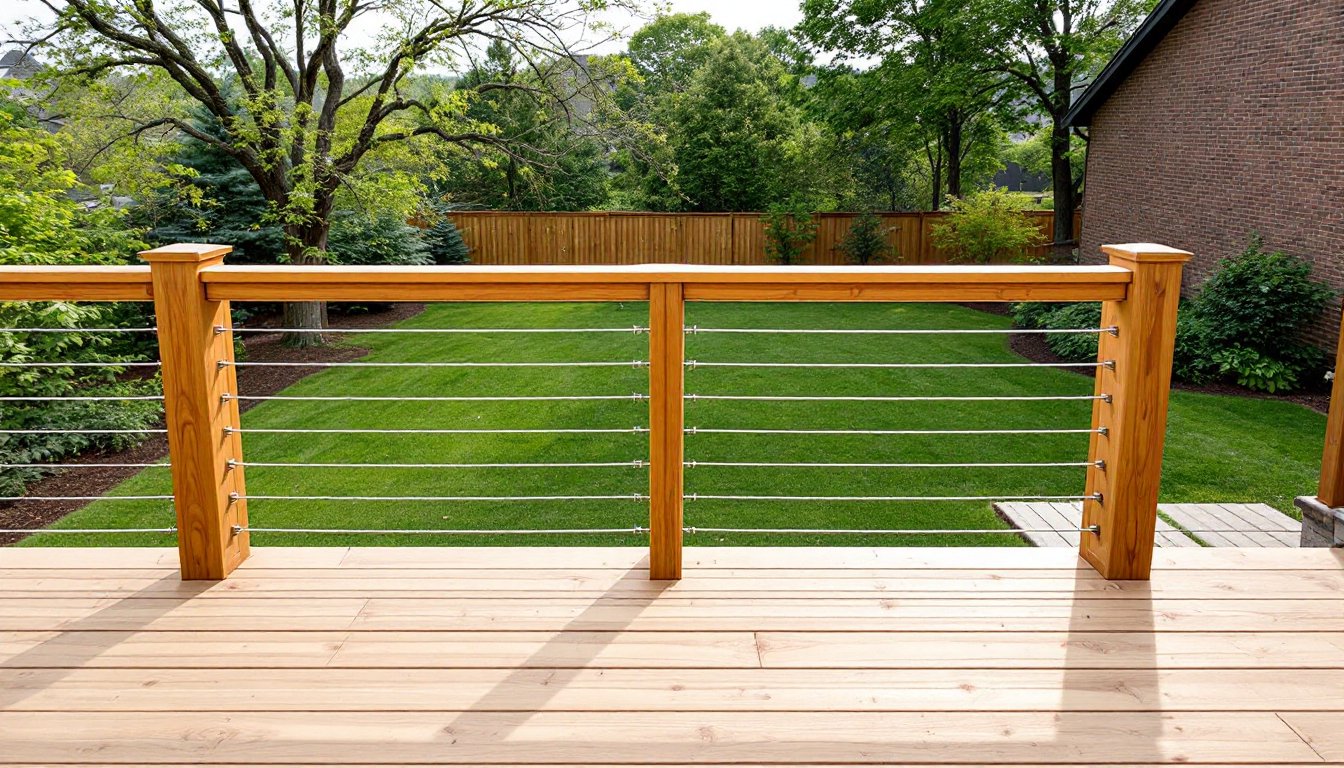
A cable deck railing system pairs vertical wood posts with horizontal stainless steel cables that run between them, creating an open, transparent barrier. The cables, typically 3/16″ or 1/4″ diameter stainless steel, are tensioned and anchored to the posts using fittings like turnbuckles, lag bolts, or specialized cable hardware. Posts are set into the deck frame at intervals (usually 4–6 feet apart), and the cables run at specific heights to meet deck railing code: a minimum of 42 inches high for residential decks, with no gap larger than 4 inches between the cables to prevent a child from squeezing through.
The appeal is clear: you get an uninterrupted view of the landscape while the cables provide a strong, code-compliant safety barrier. The wood posts anchor everything, handle lateral loads, and provide a warm, traditional contrast to the sleek steel. When properly installed, a cable railing can handle the same abuse as solid balusters, wind pressure, leaning, and everyday wear.
Why Choose Cable Railing Over Traditional Options
Cable railings offer several practical advantages over solid balusters or composite materials. First, visibility: the open design doesn’t block views or sunlight, making smaller decks feel larger and maintaining sightlines to the yard or water beyond. Second, aesthetics without compromise: the minimalist look pairs with virtually any deck style, Craftsman, modern, farmhouse, or coastal, while wood posts keep things warm and natural.
Third, low maintenance compared to some alternatives. Stainless steel cables resist rust far better than painted steel, and you won’t deal with the splintering or rot risk of solid wood balusters. Unlike composite balusters that can stain or fade, stainless cables age gracefully with a subtle patina.
Finally, installation flexibility. Cables work on straight runs, curved decks, and raised platforms, and they’re easier to adjust during installation than rigid balusters. If you make a mistake tightening cables, you can loosen and retension. Solid balusters, by contrast, must be precisely cut and positioned upfront.
Materials and Construction Essentials
Selecting Quality Wood for Posts
Deck posts must be structural-grade lumber rated for outdoor use. Most builders choose pressure-treated pine or 2×6 or 2×8 solid-sawn posts, sized to carry the deck load plus lateral forces from the railing. Pressure-treated wood resists rot and termites: opt for wood treated to .60 pounds per cubic foot (PCF) or higher for ground contact and exterior exposure.
Alternatively, composite or PVC posts offer no-stain durability but are more expensive and require different fastening methods (stainless steel bolts, not nails). Cedar or redwood look beautiful but need regular staining or sealing: they’re less practical for railings taking weather exposure.
Before installation, let lumber acclimate to site conditions for 7–10 days so it reaches moisture equilibrium. Posts that are too wet or dry will move after tensioning the cables, throwing off your spacing and sightlines.
Cable Types and Specifications
Stainless steel 316-grade cable is the industry standard for decks because it resists salt spray and coastal corrosion better than cheaper 304-grade. Purchase galvanized steel cable only if absolutely necessary, it corrodes faster outdoors and should never be used in coastal areas.
Diameter matters: 3/16″ cable works for deck railings up to 6 feet between posts: 1/4″ cable is safer for longer spans or high-wind regions, and it handles abuse better. Avoid vinyl-coated cables for decks (they can trap moisture and corrode underneath).
Cable termination hardware, turnbuckles, lag-eye bolts, swageless fittings, must also be stainless steel or stainless-steel-lined. Mixing materials (e.g., steel fittings with stainless cable) causes galvanic corrosion: the pairing will rust out in 3–5 years even under normal exposure.
Installation, Maintenance, and Long-Term Care
Before starting, verify your local building code. Most jurisdictions adopt the International Residential Code (IRC), but railing requirements vary by region, some jurisdictions have stricter cable spacing or height rules. Obtain any required permits: railing is structural and an inspector will want to verify load capacity and code compliance.
Installation steps (simplified for a standard straight run):
- Set posts in concrete footings at 4–6 foot intervals, ensuring they’re plumb and level. Posts should extend at least 42 inches above the deck surface: taller posts allow flexibility for multi-cable designs.
- Drill holes or install cable hardware (lag-eye bolts or turnbuckles) at code-required heights, typically starting at 6 inches and every 4–6 inches upward.
- Thread cable through fittings, leaving slight slack initially.
- Hand-tighten all connections first, then use a tension tool (cable tensioner or turnbuckle wrench) to tension evenly.
- Measure gaps, they must not exceed 4 inches. Adjust tension if needed.
Tensioning is critical: under-tensioned cables sag and feel loose (unsafe and looks bad): over-tensioned cables can pull posts out of plumb or snap. Aim for light tension where cables are taut but not drum-tight. A professional tool ($15–50 rental) makes this easier than guessing.
Safety first: wear eye protection and work gloves when handling wire rope, frayed cables can cut skin. If drilling through posts, use a sharp stainless steel bit to reduce friction and heat.
Maintenance: every spring, inspect for loose fittings and re-tighten if needed. Stainless steel cables need minimal care, rinse with fresh water after salt exposure or heavy dirt. If you notice discoloration or pitting, the cable is corroding: replace it. A coat of clear deck sealant on posts every 2–3 years protects the wood from UV and moisture, extending their life to 15–20+ years.
Conclusion
Cable deck railings with wood posts deliver modern aesthetics without sacrificing safety, visibility, or longevity. The key to a successful project is choosing structural-grade pressure-treated posts, marine-grade stainless steel cable, and matching hardware, then taking time on layout, tensioning, and maintenance. With proper installation and annual inspection, a cable railing system outlasts traditional balusters and looks better doing it. If you’re uncertain about structural calculations or local codes, consulting a deck contractor or engineer is worth the peace of mind.